Music Theory: Lesson 2
Notation of the Seven Basic Pitches
By Zack Cart
If you have not read Music Theory: Lesson 1 - Basic Twelve Not Division of the Octave, you might wish to; this lesson will heavily rely on what is explained there. If you have read it, and/or feel comfortable with the twelve pitches into which western music generally divides the octave, read on, and enjoy!
As most of us likely know, the different keys on the piano all have names, based on letters and modifiers.Due to the evolutionary nature of music theory, the naming system is a bit awkward, and highly counterintuitive. If it is seems awkward, cumbersome and poorly designed, that is not a faiuling in your mind, it is all of those things!
There are seven basic note names used in Western Music Theory, A, B, C, D, E, F, and G. These correspond to the white keys on the keyboard, as shown below in the image. You will note that they repeat in sync with the pattern of white and black keys, and that letter names correspond exactly with the octave patterns from Music Theory: Lesson 1 - Basic Twelve Not Division of the Octave. This is so for a reason! Every note, has an octave relationship with every other note of the same name; for example, every C note has an octave relationship to all the other C notes. (Although it is slightly morecomplicated than this, the explanation is satisfactory for the current lesson.)
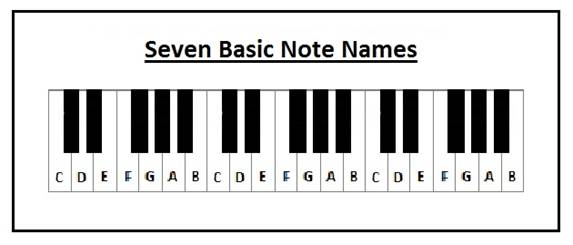
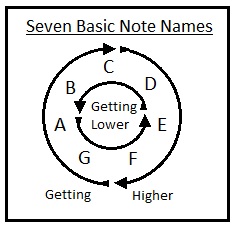
These seven notes "ascend" in pitch, or get "higher" in the order shown reading left to right on the keyboard, and "descend"or get "lower" in the opposite order. Notes we call "low" in current Western Theory, are those with a heavy, rumbling frequency, such as a large truck coasting in gear, the low strings on a bass guitar, the far left keys on the piano, a deep man's voice. "High" notes are squeaky and bright, like bird song, finger's circling a wine glass, the far right piano keys, and screaming 80's guitar solos. Note that the seven notes keep cycling, as shown below and on the keyboard, so that E is higher than C, G is higher than E, and the next C is higher than all three. Study the image below, and play around with the corresponding white piano keys until this makes perfect sense to you. Don't continue until it does!
Next, we have to learn what these notes look like written on paper in music notation. In the following image, there are three very important elements we will now focus on. First, the staff; this is the set of five parallel lines. Each one of this represents one of the note names. There are also four spaces between the lines, which similarly represent note names. Second, we see that fancy, curlicued symbol at the left end of the staff, called the "clef." This particular clef is the called the "treble" or "G" clef. Depending on which clef you see to the left of the stave, the note names of the lines and spaces will change. Don't worry, only two clefs are currently in common usage! Third, there are the circles. These are the notes, if the circle is spilt by a line of the staff, it represents that line, if it is nestled in a space, it represents that space. Below are detailed the basic note names of the treble clef. You will notice that the notes extend both above and below the staff.

And here we see the use of the "bass" or "F" clef, along with its corresponding note names.

Each of these notes corresponds with a specific pitch, or key on the piano; you can figure out which is which, on a standard 88 key piano, by counting Cs. "Middle C," or the lowest note shown on the treble clef diagram and the highest shown in the bass clef diagram, is the fourth C from the right hand side of the keyboard, or fifth from the left. If you taken the time to learn and understand everything up to this point, you should be able to figure out the middle section of the keyboard from this information. Do this now!
I recomend getting a hold of some blank music notation paper, easily purchased at stationary stores or online. (Or make your own -- I do!) Write down a random series of ten to twenty notes in either clef. Play them, left to right. Now, improvise a series of three to six notes, try to remember what you played, repeat it, and once it is in your head, notate it on the paper. Alternate these excercises ad-naseum. Don't forget to think of each note's name every time you write or play it. In this way, you should be focusing on learning both the names of the written pitches, and they're practical sound when realized. We haven't discussed rhythm yet, so don't worry about the notes' placements in time.
Don't stop until you can easily play through a twenty note series with negligeable mistakes, and can remember and notate six notes with reasonable confidence. Best of Luck!